Top
에스디옵틱스는 카메라모듈을 제작하는 각 공정에서 필요한 정밀 검사 장비를 제공합니다.단품 렌즈 검사부터 카메라모듈 완제품 검사까지 카메라모듈 제작 공정에서 필요한단계별 검사 설비를 모두 보유하고 있습니다.
에스디옵틱스는 카메라모듈을 제작하는 각 공정에서 필요한 정밀 검사 장비를 제공합니다.단품 렌즈 검사부터 카메라모듈 완제품 검사까지카메라모듈 제작 공정에서 필요한 단계별검사 설비를 모두 보유하고 있습니다.
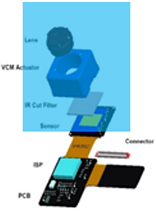
| System | Inspection Area | Status |
|---|---|---|
| Single Lens Inspection System | 렌즈의 상,하면 | In Production |
| Lens Barrel Inspection System | 바렐의 상,하,측면 | In Production |
| Lens Ass’y Inspection System | 렌즈 어세이 경통의 모든 렌즈의각각 상하면 바렐 의 상,하,측면 Iris 및 플레어 | In Production |
| Lens Flare Inspection System | ||
| VCM-Lean Ass’y Inspection system | IR필터의 상하면(AR/IR) 렌즈의 마지막면 | In Production |
| IR Attach-VCM Ass’y Inspection System | VCM에 IR필터를 조립하고 IR필터의 상,하면과 렌즈의 마지막면을 검사하는 조립및 검사기 | In Production |
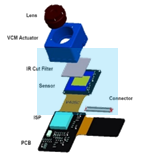
| System | Inspection Area | Status |
|---|---|---|
| Image Sensor Inspection System | 이미지센서의 유효면 | In Production |
| IR Attached Image Sensor Inspection System | IR 필터의 상,하면과 이미지센서의 유효면 | In Production |

| System | Inspection Area | Status |
|---|---|---|
| Camera Module 6-side Inspection System | 6-surface of the camera module and FPCB | In Production |
Lens & Ass’y
Digital Optic Koren CNO Bangjoo Sekonix N2A Haesung JAESUNG

Lens Ass’y + IR
Attach & VCM
UBIS Bangjoo Haesung Mir Cam IM Jahwa Hisonic Optron

Camera Module
Foxconn SEMCO SEC LGIT Patron CAMSYS MCNEX Nanos NAMUGA Cowell CRESIN HNT

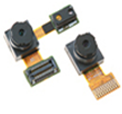
Mobile
SEC LG Apple ZTE HTC

- Non-automated microscope
- Worker’s visual inspection
- Focus controlled manually by workers
- Different result by workers
- No automated vari-focus technology
- Workers’ condition causes inaccuracy and
poor repeatability
→ High overkill and underkill
- 3 shifts/day causes labor cost increase
- Poor productivity due to many overkill
- Underkill causes post-processing cost increase
- Impossible to set and maintain a clear
inspection criteria
- Limit of inspection result documentation
- Insufficient experienced worker
- High turnover due to difficult work condition
- Vari-Focus vision basis
- Automation algorithm
- Automated interlayer analysis
- Result of interlayer analysis
- Excellent repeatability due to automation
- Different defect criteria by inspection field
- Detection of micron defect such as stain, etc.
- Production increase using auto inspection
- Minimize overkill using optimized algorithm
- Save post-processing cost by controlling underkill
- Inspection standardization
- One step inspection and defect analysis
- Inspection result database
- Production control by defect type
- Several machines control per person
Inspection
Method
Interlayer
Analysis
Inspection
Result
Productivity
Difference
- Lens top/bottom side inspection- Particle, black/white dot, bubble, scratch, contamination, coating error inspection- Using the combination of multi illumination system
| Items | SD Optics | Remark |
|---|---|---|
| Min. Defect size | ≤ 12um | Base on short side of defect |
| Detect defection type |
Particle, Black dot, White dot, Bubble, Scratch, Contamination, Coating error |
Inspection area : Lens top/bottom |
| Underkill | ≤ 0.5% | - Base on mass production product 2,000ea |
| Overkill | ≤ 2% | - Not including ±1 pixel size deviation, secondary contamination, Visual inspector error |
| Repeatability | 97% | - Not including less than 30 gray value defect |
| Cycle Time | 0.35 sec/ea. | - 180ea products/tray, Magazine to Magazine |
| Vision System | Top : 4M x 2 sets, Bottom : 4M x 2 sets | Option: Color camera, Dual Magazine |
| Pixel resolution | 6.1um | |
| FOV | 12mm x 12mm | |
| Light | Multi-light system | Designed by SD OPTICS |
| NG product | Marking | |
| Tray loading | 20 coating trays/magazine |
- Lens top/bottom side, Barrel inspection- Particle, black/white dot, bubble, scratch, contamination, coating error inspection- Auto NG Sorting system
| Items | SD Optics | Remark |
|---|---|---|
| Min. Defect size | ≤ 12um | Base on short side of defect |
| Detect defection type |
Particle, Black dot, White dot, Bubble, Scratch, Contamination, Coating error,Barrel, and so on. |
Inspection area : Lens top/bottom, Barrel top/bottom(Option : Barrel Side) |
| Underkill | ≤ 1% | - Base on mass production product 2,000ea |
| Overkill | ≤ 6% | - Not including ±1 pixel size deviation, secondary contamination, Visual inspector error |
| Repeatability | ≥ 95% | - Not including less than 30 gray value defect |
| Cycle Time | 2.0 sec/ea. | - 100ea products/tray, Magazine to Magazine |
| Vision System | Top : 4M x 2 sets, Bottom : 4M x 2 sets |
Option 1) Barrel Side Inspection vision 2. Iris inspection vision(Check assembled of not) Option 2) Iris inspection vision (check if assembled or not) |
| Pixel resolution | 6.1um | |
| FOV | 12mm x 12mm | |
| Light | Multi-light system | Designed by SD OPTICS |
| NG product | Sorting | |
| Tray loading | 10 trays/magazine |
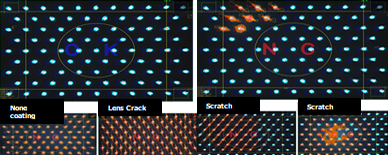
- Lens top/bottom/side/inside of lens ass’y barrel- Iris inside of lens ass’y- Lens flare inspection- Auto NG Sorting system
| Items | SD Optics | Remark |
|---|---|---|
| Min. Defect size | ||
| Detect defection type |
Flare | |
| Underkill | ≤ 0.6% | - Base on mass production product 2,000ea |
| Overkill | ≤ 6% | - Not including ±1 pixel size deviation, secondary contamination, Visual inspector error |
| Repeatability | ≥ 95% | - Not including less than 30 gray value defect |
| Cycle Time | 2.3 sec/ea. | - 100ea products/tray, Magazine to Magazine |
| Vision System | Pre-focus vision 1 set | Pre-align vision system |
| Pixel resolution | Using customer’s Image sensor | |
| FOV | - | |
| Light | LED Array | Designed by SD OPTICS |
| NG product | Sorting | |
| Tray loading | 10 trays/magazine |
Customer Image
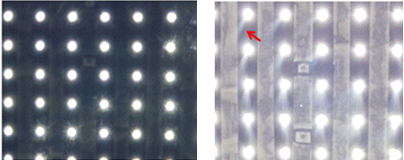

Results Image
- Barrel Top/Bottom/Side inspection, barrel inside inspection- Particle, dent, scratch, contamination, coating error- Using the combination of multi illumination system
| Items | SD Optics | Remark |
|---|---|---|
| Min. Defect size | 20um | Base on short side of defect |
| Detect defection type |
Particle, Dent, Scratch, Conramination, Coating error |
Inspection area : Barrel Top/Bottom/Side, Barrel inside |
| Underkill | ≤ 1% | - Base on mass production product 2,000ea |
| Overkill | ≤ 6% | - Not including ±1 pixel size deviation, secondary contamination, Visual inspector error |
| Repeatability | ≥ 95% | - Not including less than 30 gray value defect |
| Cycle Time | 2.0 sec/ea. | - 100ea products/tray, Magazine to Magazine |
| Vision System | Bottom : 2M x 1 set, Side : 2M x 1 set Inside : 2M x 1 set, Top : 4M x 2 sets (color) |
|
| Pixel resolution | 7.6um | |
| FOV | 14mm x 14mm | |
| Light | Multi-light system | Designed by SD OPTICS |
| NG product | Sorting | |
| Tray loading | 10 trays/magazine |
- IR Filter top/bottom & Lens top side inspection- Particle, black dot, white dot, bubble, scratch, contamination, coating error, bonding error- Using the combination of multi illumination system
| Items | SD Optics | Remark |
|---|---|---|
| Min. Defect size | ≥ 15 um ≥ 15 um ≥ 30 um |
IR filter AR side IR filter AR side Lens top side |
| Detect defection type |
Particle, Black dot, White dot, Bubble, Scratch, Contamination, Coating error, Bonding error |
Inspection area : IR Filter Top/Bottom & Lens top side |
| Underkill | ≤ 0.2% | - Base on mass production product 2,000ea |
| Overkill | ≤ 8% | - Not including ±1 pixel size deviation, secondary contamination, Visual inspector error |
| Repeatability | ≥ 95% | - Not including less than 30 gray value defect |
| Cycle Time | 0.9 sec/ea. | - Base on dual line concept |
| Vision System | 4M x 1 set | |
| Pixel resolution | 6.1um | |
| FOV | 12mm x 12mm | |
| Light | Multi-light system | Designed by SD OPTICS |
| NG product | Sorting | |
| Tray loading | 5 trays/magazine |
- Effective area of image sensor inspection- Particle, contamination- Using the combination of multi illumination system
| Items | SD Optics | Remark |
|---|---|---|
| Min. Defect size | ≥ 1 um | |
| Detect defection type |
Particle, contamination | Image sensor effective area |
| Underkill | ≤ 0.5% | - Base on mass production product 2,000ea |
| Overkill | ≤ 2% | - Not including ±1 pixel size deviation, secondary contamination, Visual inspector error |
| Repeatability | ≥ 97% | - Not including less than 30 gray value defect |
| Cycle Time | 1.5 sec/ea. | - Excluding the Loading/Unloading time by operator |
| Vision System | Top : 4M x 1 set | |
| Pixel resolution | 4.23um | |
| FOV | 10mm x 10mm | |
| Light | Multi-light system | Designed by SD OPTICS |
| NG product | Manual (Cleaning by operator) | Using 20x Microscope |
| Tray loading | 1 strip | Manual |
- Top side of camera module inspection- Particle, scratch, contamination, poron shift, FPCB, Connector- Using the combination of multi illumination system
| Items | SD Optics | Remark |
|---|---|---|
| Min. Defect size | ≥ 50 um ≥ 150 um |
Lens top Poron, FPCB, connector |
| Detect defection type |
Particle, Scratch, Contamination Poron shift, FPCB, Connector |
Inspection area : Module top side |
| Underkill | ≤ 0.25% | - Base on mass production product 2,000ea |
| Overkill | ≤ 5% | - Not including ±1 pixel size deviation, secondary contamination, Visual inspector error |
| Repeatability | ≥ 97% | - Not including less than 30 gray value defect |
| Cycle Time | 2.5 sec/ea. | - Excluding the Loading/Unloading time by operator |
| Vision System | Module top side : 4M x 2 sets | |
| Pixel resolution | 6.1 um / 11.4 um | |
| FOV | 12.5 x 12.5 / 23.2 x 23.2 (mm) | |
| Light | Multi-light system | Designed by SD OPTICS |
| NG product | Sorting | |
| Tray loading | 1 tray | Loading/Unloading by operator |
- 6-surface of the camera module top/side/bottom inspection- Particle, scratch, contamination, poron shift, FPCB, Connector stiffener- Using the combination of multi illumination system
| Items | SD Optics | Remark |
|---|---|---|
| Min. Defect size | ≥ 50 um ≥ 50 um |
Lens top side Poron, FPCB, connector |
| Detect defection type |
Particle, Scratch, Contamination Poron, FPCB, Connector stiffener |
Inspection area : Module top/ Side/Bottom |
| Underkill | ≤ 0.2% | - Base on mass production product 2,000ea |
| Overkill | ≤ 5% | - Not including ±1 pixel size deviation, secondary contamination, Visual inspector error |
| Repeatability | ≥ 97% | - Not including less than 30 gray value defect |
| Cycle Time | 2.1 sec/ea. | - Base on Mass production product 5 LOTs (60 ea./Tray) |
| Vision System | 5M x 9 sets | Color camera |
| Pixel resolution | 3.8 um / 5.8 um | |
| FOV | 9.3 x 7.9 / 16.2 x 13.7 (mm) | |
| Light | Multi-light system | Designed by SD OPTICS |
| NG product | Sorting | |
| Tray loading | Magazine |
Chipping on Barrel
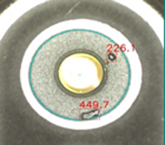
Damages on Connector
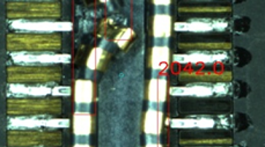
Lens Scratch
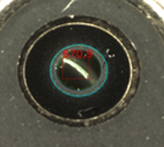
Dent on Shield can
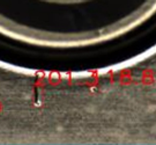
Lack of epoxy
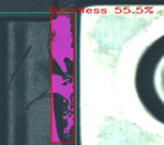
- Bar type flash lens top/bottom side inspection- Particle, black dot, white dot, scratch, contamination- Auto NG sorting system
| Items | SD Optics | Remark |
|---|---|---|
| Min. Defect size | ≥ 30 um | Base on short side of defect |
| Detect defection type |
Particle, Black dot, White dot, Scratch, Contamination |
Inspection area : Lens Top, Bottom |
| Underkill | ≤ 0.5% | - Base on mass production product 2,000ea |
| Overkill | ≤ 2% | - Not including ±1 pixel size deviation, secondary contamination, Visual inspector error |
| Repeatability | ≥ 97% | - Not including less than 30 gray value defect |
| Cycle Time | 1.2 sec/ea. | - 32ea products/tray - Dual line concept |
| Vision System | Top: 4M x 2 sets, Bottom: 4M x 2 sets | |
| Pixel resolution | 6.1 um | |
| FOV | 12mm x 12mm | |
| Light | Multi-light system | Designed by SD OPTICS |
| NG product | Sorting | |
| Tray loading | Stack | 40 tray at once |
- Single type flash lens top/bottom and side inspection- Particle, black dot, white dot, scratch, contamination- Using the combination of multi illumination system
| Items | SD Optics | Remark |
|---|---|---|
| Min. Defect size | ≥ 30 um | Base on short side of defect |
| Detect defection type |
Particle, Black dot, White dot, Scratch, Contamination |
Inspection area : Lens Top, Bottom, Side |
| Underkill | ≤ 0.5% | - Base on mass production product 2,000ea |
| Overkill | ≤ 3% | - Not including ±1 pixel size deviation, secondary contamination, Visual inspector error |
| Repeatability | ≥ 95% | - Not including less than 30 gray value defect |
| Cycle Time | 1.3 sec/ea. | - 60ea products/tray |
| Vision System | Top: 4M x 2 sets Bottom: 4M x 2 sets Side: 4M x 2 sets |
|
| Pixel resolution | 6.1 um | |
| FOV | 12mm x 12mm | |
| Light | Multi-light system | Designed by SD OPTICS |
| NG product | Sorting | |
| Tray loading | Stack | 40 tray at once |
- VR/AR lens top/bottom and side inspection- Particle, black dot, white dot, bubble, scratch, contamination- Using the combination of multi illumination system- Auto NG sorting
| Items | SD Optics | Remark |
|---|---|---|
| Min. Defect size | ≤ 50um | |
| Detect defection type |
Particle, Black dot, White dot, Bubble, Scratch, Contamination |
Inspection area : Lens top/bottom |
| Underkill | ≤ 0.5% | - Base on mass production product 2,000ea |
| Overkill | ≤ 3% | - Not including ±1 pixel size deviation, secondary contamination, Visual inspector error |
| Repeatability | ≥ 95% | - Not including less than 30 gray value defect |
| Cycle Time | 4sec/ea | - 1 lens/tray |
| Vision System | Top : 25M x 2 sets, Bottom : 25M x 1 sets | |
| Pixel resolution | 13.1um | |
| FOV | 60mm x 60mm | |
| Light | Multi-light system | Designed by SD OPTICS |
| NG product | Sorting | |
| Tray loading | Stack |
- Defect before and after wire bonding in module - Bumped ball size, ball interval, ball~edge interval length, scratch, chipping, defect - Defect Marking / Mapping
| Items | SD Optics | Remark |
|---|---|---|
| Min. Defect size | 5um | Base on short side of defect |
| Detect defection type |
Bumped Ball size, Ball Interval, Ball to Edge Interval length, scratch, Chipping, Defect |
|
| Underkill | ≤ 1% | - Base on mass production product 2,000ea |
| Overkill | ≤ 6% | - Not including ±1 pixel size deviation, secondary contamination, Visual inspector error |
| Repeatability | ≥ 95% | - Not including less than 30 gray value defect |
| Cycle Time | 0.75sec/ea | |
| Vision System | Top : 4M 2sets | Base on dual line concept |
| Pixel resolution | 1.6um | |
| FOV | 3.2mm x 3.2mm | |
| Light | Multi-light system | Designed by SD OPTICS |
| NG product | Laser Marking | |
| Tray loading | Magazine |
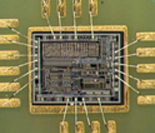

- Live 3D visual display - Auto-Focus, Multi focus, AIF Image function - SW package (Auto-measure, data management, create&edit, etc) - Lighting control for each illuminations
| Items | SD Optics | Remark |
|---|---|---|
| Stage moving range | 500 x 350 x 100 | XYZ, mm |
| WS Magnification | 1.3 x | |
| FOV (mm) | 8.5 x 8.5 | |
| Scanning Depth | 6.1 mm | |
| Depth Resolution | 19.2 um | |
| Accuracy | ± 10 um | |
| Illumination | 24 sector control system | SD in-house made |
- Acquisition High precision color image based on In-Focus color image- Acquisition of three illuminations images at the same location- Real-time Focusing Ability for LDI Inspection Surface
| Items | Description | Remark |
|---|---|---|
| Product | COG Upgrade | |
| Size / Weight | 1,640(W) x 1,300(D) x 2,360(H), 1.5 ton | |
| Min. Defect Size | 6μm | |
| UPH | ≥ 6,000 UPH | (4” tray, 3x33 array, Dual Illumination, defect rate 3%) |
| ≥ 3,700 UPH | (2” tray, 2x20 array, Dual Illumination, defect rate 3%) |
|
| Detectability | Underkill ≤ 0.1% Overkill ≤ 1% Repeatability ≥ 95% |
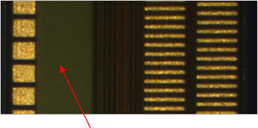
Dark area inspection
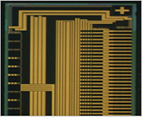 Coaxial Illumination
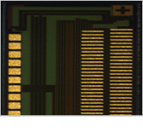 Bump illumination
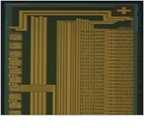 Multi illumination
- Precision measuring defects in the interlayer of flat or curved display
| Items | Spec | Remark |
|---|---|---|
| WS Magnification | 7.5 x | |
| FOV (mm) | 2.3 x 2.2 | |
| Scanning Depth | 0.688mm | |
| Depth Resolution | 2.15um | |
| Accuracy | ± 5um | Scanning range 1.45mm |
| Measuring T/T | 84 sec / 120 cut |
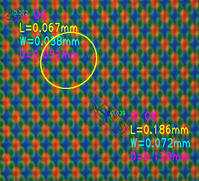 Material(defect) transparency
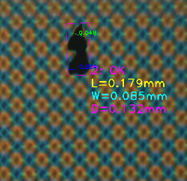 Defect on Curved Surface
- Detection of micro crack on the flat and curved display
| Items | Spec | Remark |
|---|---|---|
| WS Magnification | 2.3 x | |
| FOV (mm) | 5.5 x 5.5 | |
| Scanning Depth | 4.9mm | |
| Depth Resolution | 15.5um | |
| Accuracy | ± 6um | Scanning range 1.45mm |
| Measuring T/T | - | Depends on the required insp. spec |
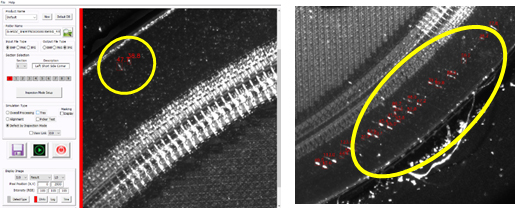 Detection of the crack on the curved surface